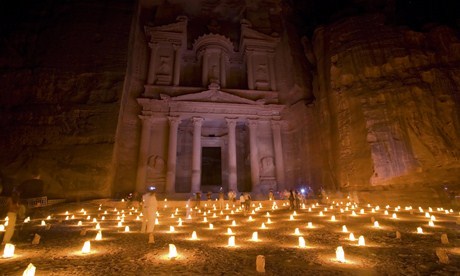
Jordan's rose-red city adorns a million postcards, so how do you capture a fresh perspective? Pro travel photographer and Travel Photo of the Year judge Paul Harris works the angles
From the Euphrates to the Red Sea, the Nabatean civilisation carved out a unique place in the culture of the Middle East, and nowhere more so than in the construction of Petra. At the peak of its power around the time of Christ, this extraordinary sandstone city was subsequently lost to the outside world for 800 years. 2012 marked the 200th anniversary of its dramatic ‘rediscovery’ by the Anglo-Swiss explorer Johann Burckhardt.
Renowned for its highly preserved tombs, temples and facades, Petra is a UNESCO World Heritage Site and Jordan’s biggest attraction for visitors, archaeology aficionados and photographers alike – which can make for a thronged experience. The crowds aside, Petra throws up some interesting photographic challenges, which can be overcome with a little thought and planning on how to avoid and improve on the clichés.
Creating a sense of place and connection with its culture and history will enhance both your own experience and those who may not have a chance to visit one of the great wonders of the world.
All photographs taken by Paul Harris and Wanderlust Journeys: On Assignment participants Yani Davis, Malcolm Cartledge, Claire Waring and Pawel Lipski
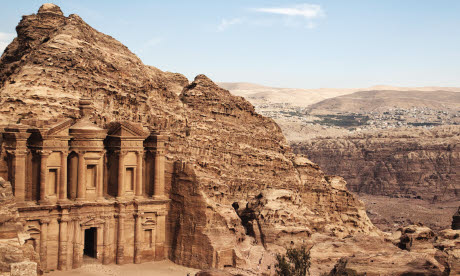
What: Carved out of the mountainside to the west of Petra, the Monastery (Ad Deir) is the largest monument on the site. It’s also much less crowded than the picture-postcard Treasury below.
Where: To the west and 200m above the ancient city. From a higher viewpoint like this, you can give a real sense of its location.
When: Mid to late afternoon, when full sun brings a warm hue to the sandstone. It does mean you have to do the hour-long hike in the heat of the day; leave time to get down!
Technical details: Canon EOS -1D MkII, ISO400, 24-105mm lens (set at 45mm), 1/250sec @ f4.0
Tip: Focus on the facade, and then recompose to show the landscape.
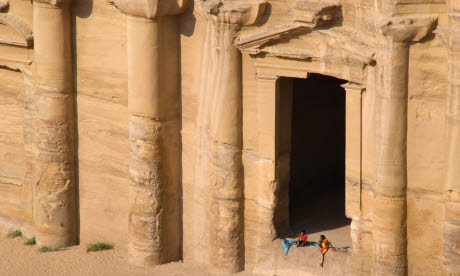
What: Entrance to the Monastery facade, overlooking Petra.
Where: From a similar high viewpoint as Picture 1, but this time with a telephoto zoom. The tight, off-centred composition of pillars and people emphasizes the scale of the entrance.
When: Again, the late afternoon light warms the sandstone hues and creates shadows adding to the depth.
Technical details: Nikon D80, ISO 250, 18-200mm lens set at 155mm, 1/200sec @ f18
Tip: Use a zoom lens to experiment with different crops, and see how this affects the sense of scale.
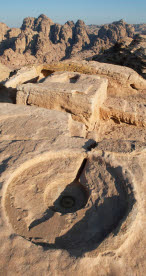
What: The High Place of Sacrifice on Jebel al–Madhbah, reached by worn stone paths branching off from the route to the Treasury.
Where: Approached from one of two wadis (valleys), the High Place is one of a few accessible locations where you can get up high and see the ancient city from above. It is literally a breath of fresh air, a place to linger before a slow descent through Wadi Farasa past numerous Nabatean tombs and temples.
When: It will take a good 45 minutes to reach this high point for dawn so make the effort to get up early and be first at the entrance gate when they open at 6am.
Technical details: Nikon D700, ISO 100, 24-70mm lens (set at 24mm), 1/200 sec @ f14
Tip: A tripod will be useful to maximise your depth of field, allowing you to use a small aperture and slow shutter speeds while retaining sharpness.
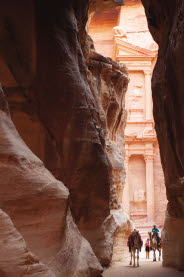
What: The Treasury (Al Khazneh)
Where: This is the time-honoured view of the Treasury, revealed suddenly when exiting from the depths of the narrowing canyon called the Siq.
When: Because the Treasury is built deep into the canyons, it is only lit by the sun for a few hours in the day, usually mid-morning to midday. Direct or partial sunlight is best avoided because of the extreme contrast. Also, this is one of the busiest times of day for visitors, so getting a clear view is challenging. This shot was taken early afternoon when light is bouncing off the opposite wall accentuating the pink and red hues. An alternative view is from above, which requires following steep sided trails (not for the faint hearted!) to reveal its position at the head of the Siq.
Technical details: Nikon D3, ISO 400, 24-70mm lens (set at 60mm), 1/60 sec @ f4.5
Tip: Try a slow shutter speed or time lapse sequence on a tripod to show the flow of visitors through the canyon.
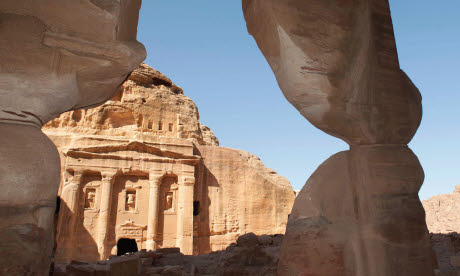
What: Triclinium of the Roman Soldier Tomb, Wadi Farasa.
Where: Returning from the High Place of Sacrifice into the city complex, there is a whole host of nooks and crannies, tombs and facades to discover along the Wadi Farasa. The narrow wadi allows you to frame the facades from inside the tombs.
When: Anytime in the early morning or mid to late afternoon when the facades are sunlit.
Technical details: Nikon D700, ISO 100, 24-70mm lens (set at 24mm) , 1/250 sec @ f8, fill-in flash
Tip: Because of the extreme contrast of light you might consider using some fill in flash to reveal the colours in the sandstone.
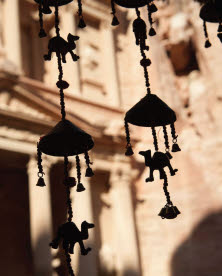
What: Tourist trinkets at the Treasury.
Where: Stalls and cafés line the wall facing the Treasury facade, making it a good place to rest and admire the archaeology, but also to create a story-telling foreground.
When: This shot was taken early in the morning when the sun is just starting to light up the facade, but any time of the day would work. The key is to use a wide aperture to throw the background out of focus, while retaining enough detail to show its presence.
Technical details: Nikon D700, ISO 125, 24-70mm lens (set at 55mm), 1/400 sec @ f6.3
Tip: Without flash, the camels will be silhouetted against the bright background; if you use flash you can also show their colours and detail.
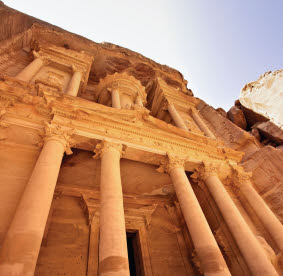
What: An extreme angle of the sandstone facade of the Treasury. Without people or a familiar object in the scene, it is difficult to get a sense of scale of these monuments, so try using an extreme wide angle to emphasize the architecture.
Where: At the base of the Treasury.
When: After about 11am, the sun disappears from the narrow canyon that houses the Treasury, but natural light bounces off the opposite wall increasing colour and hue.
Technical details: Canon EOS 50D, ISO 200, 10-22mm lens (set at 10mm), 1/200s @ f7.1
Tip: Many compacts have a wide-angle zoom as standard, so you can achieve this kind of shot with a point-and-shoot camera. Zoom out as far you can and get up close to your subject.
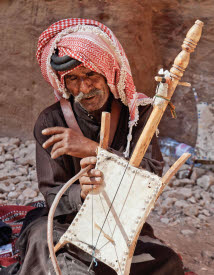
What: Local people are always a great source of images and Petra attracts traders, musicians, camels and carriages to cater for the busy tourist trade. Getting in close and engaging with your subject is key to a good portrait of a person at work.
Where: The trail beyond the Treasury.
When: The harsh desert light often creates heavy shadows across faces, which can be overcome by using the pop up, in-camera flash or photographing your subject in the shade.
Technical details: Canon EOS-1D MkIII, ISO125, 24-105mm lens (set at 67mm), 1/180s @ f6.7
Tip: If photographing traders or musicians, remember to buy something from them or make a donation in return – this is their livelihood, after all.
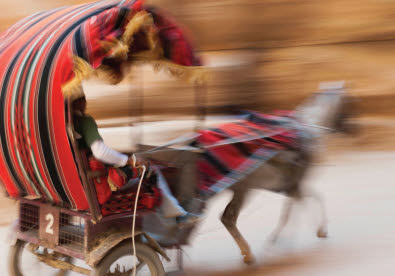
What: Horse-drawn carriages are part of the fabric of Petra. Practice photographing movement either by panning (moving the camera with the carriages) or blurring them moving past a sharply focused landscape.
Where: Along the length of the Siq.
When: Anytime when the sun is out of the Siq and during the carriage 'rush hour’, usually around mid morning and late afternoon.
Technical details: Nikon D700, ISO100, 24-70mm lens (at 62mm), 1/13 sec @ f9
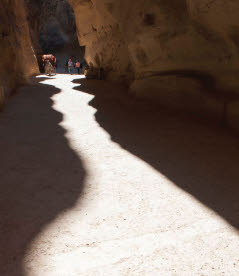
What: The play of shadows and light is a fascinating way to characterise both antiquities and canyon landscapes.
Where: As you approach the main part of the old city of Petra through the Siq, the canyons narrow considerably allowing you to compose and frame organically.
When: Light will usually reach the canyon floor around mid-to-late morning creating fantastic shapes from the surrounding canyon walls. A wide-angle lens draws the viewers eye along the trail of light and the figures give a sense of the scale.
Technical details: Nikon D700, ISO800, 24-70mm lens (at 24mm), 1/320 sec @ f13
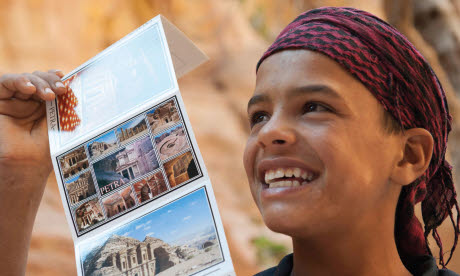
What: We tend to shy away from documenting the tourist trade but it is an essential part of the story of Petra today. The boys selling postcards are usually very friendly, if a little pushy. Buying a couple of their cards helps them earn a living, allows you to engage naturally, and produces an interesting ‘view within a view’ shot of the postcard itself.
Where: Throughout the city, but particularly along the Siq.
When: Particularly at times when tour groups are being guided.
Technical details: Nikon D700, ISO 200, 24-70mm lens (set at 70mm), 1/100 sec @ f5
Tips: Avoid direct sunlight for more natural skin tones. Create simple compositions with a standard or short telephoto lens, and shoot at – or below – your subject’s eye level.
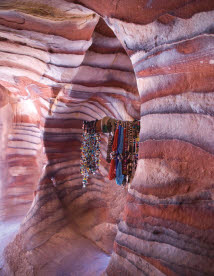
What: Bands of rainbow colours in the natural sandstone are one of the highlights of Petra, and worth seeking out.
Where: Both in the landscape, where the wind has scoured away at the soft rock, and inside many of the tombs lining the route from the Treasury to the Monastery and along the outer-lying wadis.
When: The colours in the rock will show up much better out of direct sunlight or during the first soft light of dawn and dusk.
Technical details: Nikon D80, ISO 250, 18-200mm lens (set at 18mm), 1/60 sec @ f4
Tip: Use a slow shutter speed and higher aperture with the camera on a tripod to avoid camera shake, and maximise the detail of pattern and texture in the rock. If using a compact camera, ensure you turn off the auto flash – this will kill the picture!
Although the Bedouin moved out in 1984, Petra remains central to their lives. Each morning many make the 45-minute walk down from the purpose-built village of Umm Sayhun to their businesses. Pressure to buy is relatively low; instead you’ll find smiles and good humour. Trade has been tough since the ‘Arab Spring’, so if you see something you like, do consider buying.
Do visit the handcrafted jewellery stall run by Marguerite van Geldermalsen (opposite the amphitheatre). Marguerite is a local icon. She and her late Bedouin husband, Mohammad, made their home in a Petra cave in the 1970s. Her book, Married to a Bedouin, chronicles their story. “I never meant to stay forever,” she says. “Still don’t. As long as it’s up for re-assessment, that’s fine.”
There is no restriction on the use of tripods or other photographic equipment at the site. Wear comfortable walking shoes and a hat to protect you from the sun, and carry plenty of drinking water.
Jordan’s capital, Amman, is a 5-hour flight from the UK with Royal Jordanian, easyJet and other airlines. Petra’s gateway village, Wadi Musa, is a 3-hour drive from Amman.
Tickets cost 50/55/60JD (£43/£48/£52) for 1/2/3-day visits, so are better value the longer you stay. The site opens at 6am, and early birds get the site at its quietest. If you don’t want to walk along the 1km-long Siq, you can hire a horse-drawn carriage from the many eager touts.
For more info, see www. visitjordan.com/uk.