Histograms can be daunting at first glance. But they're not as confusing as they look – here's our simple tutorial to make them work for you
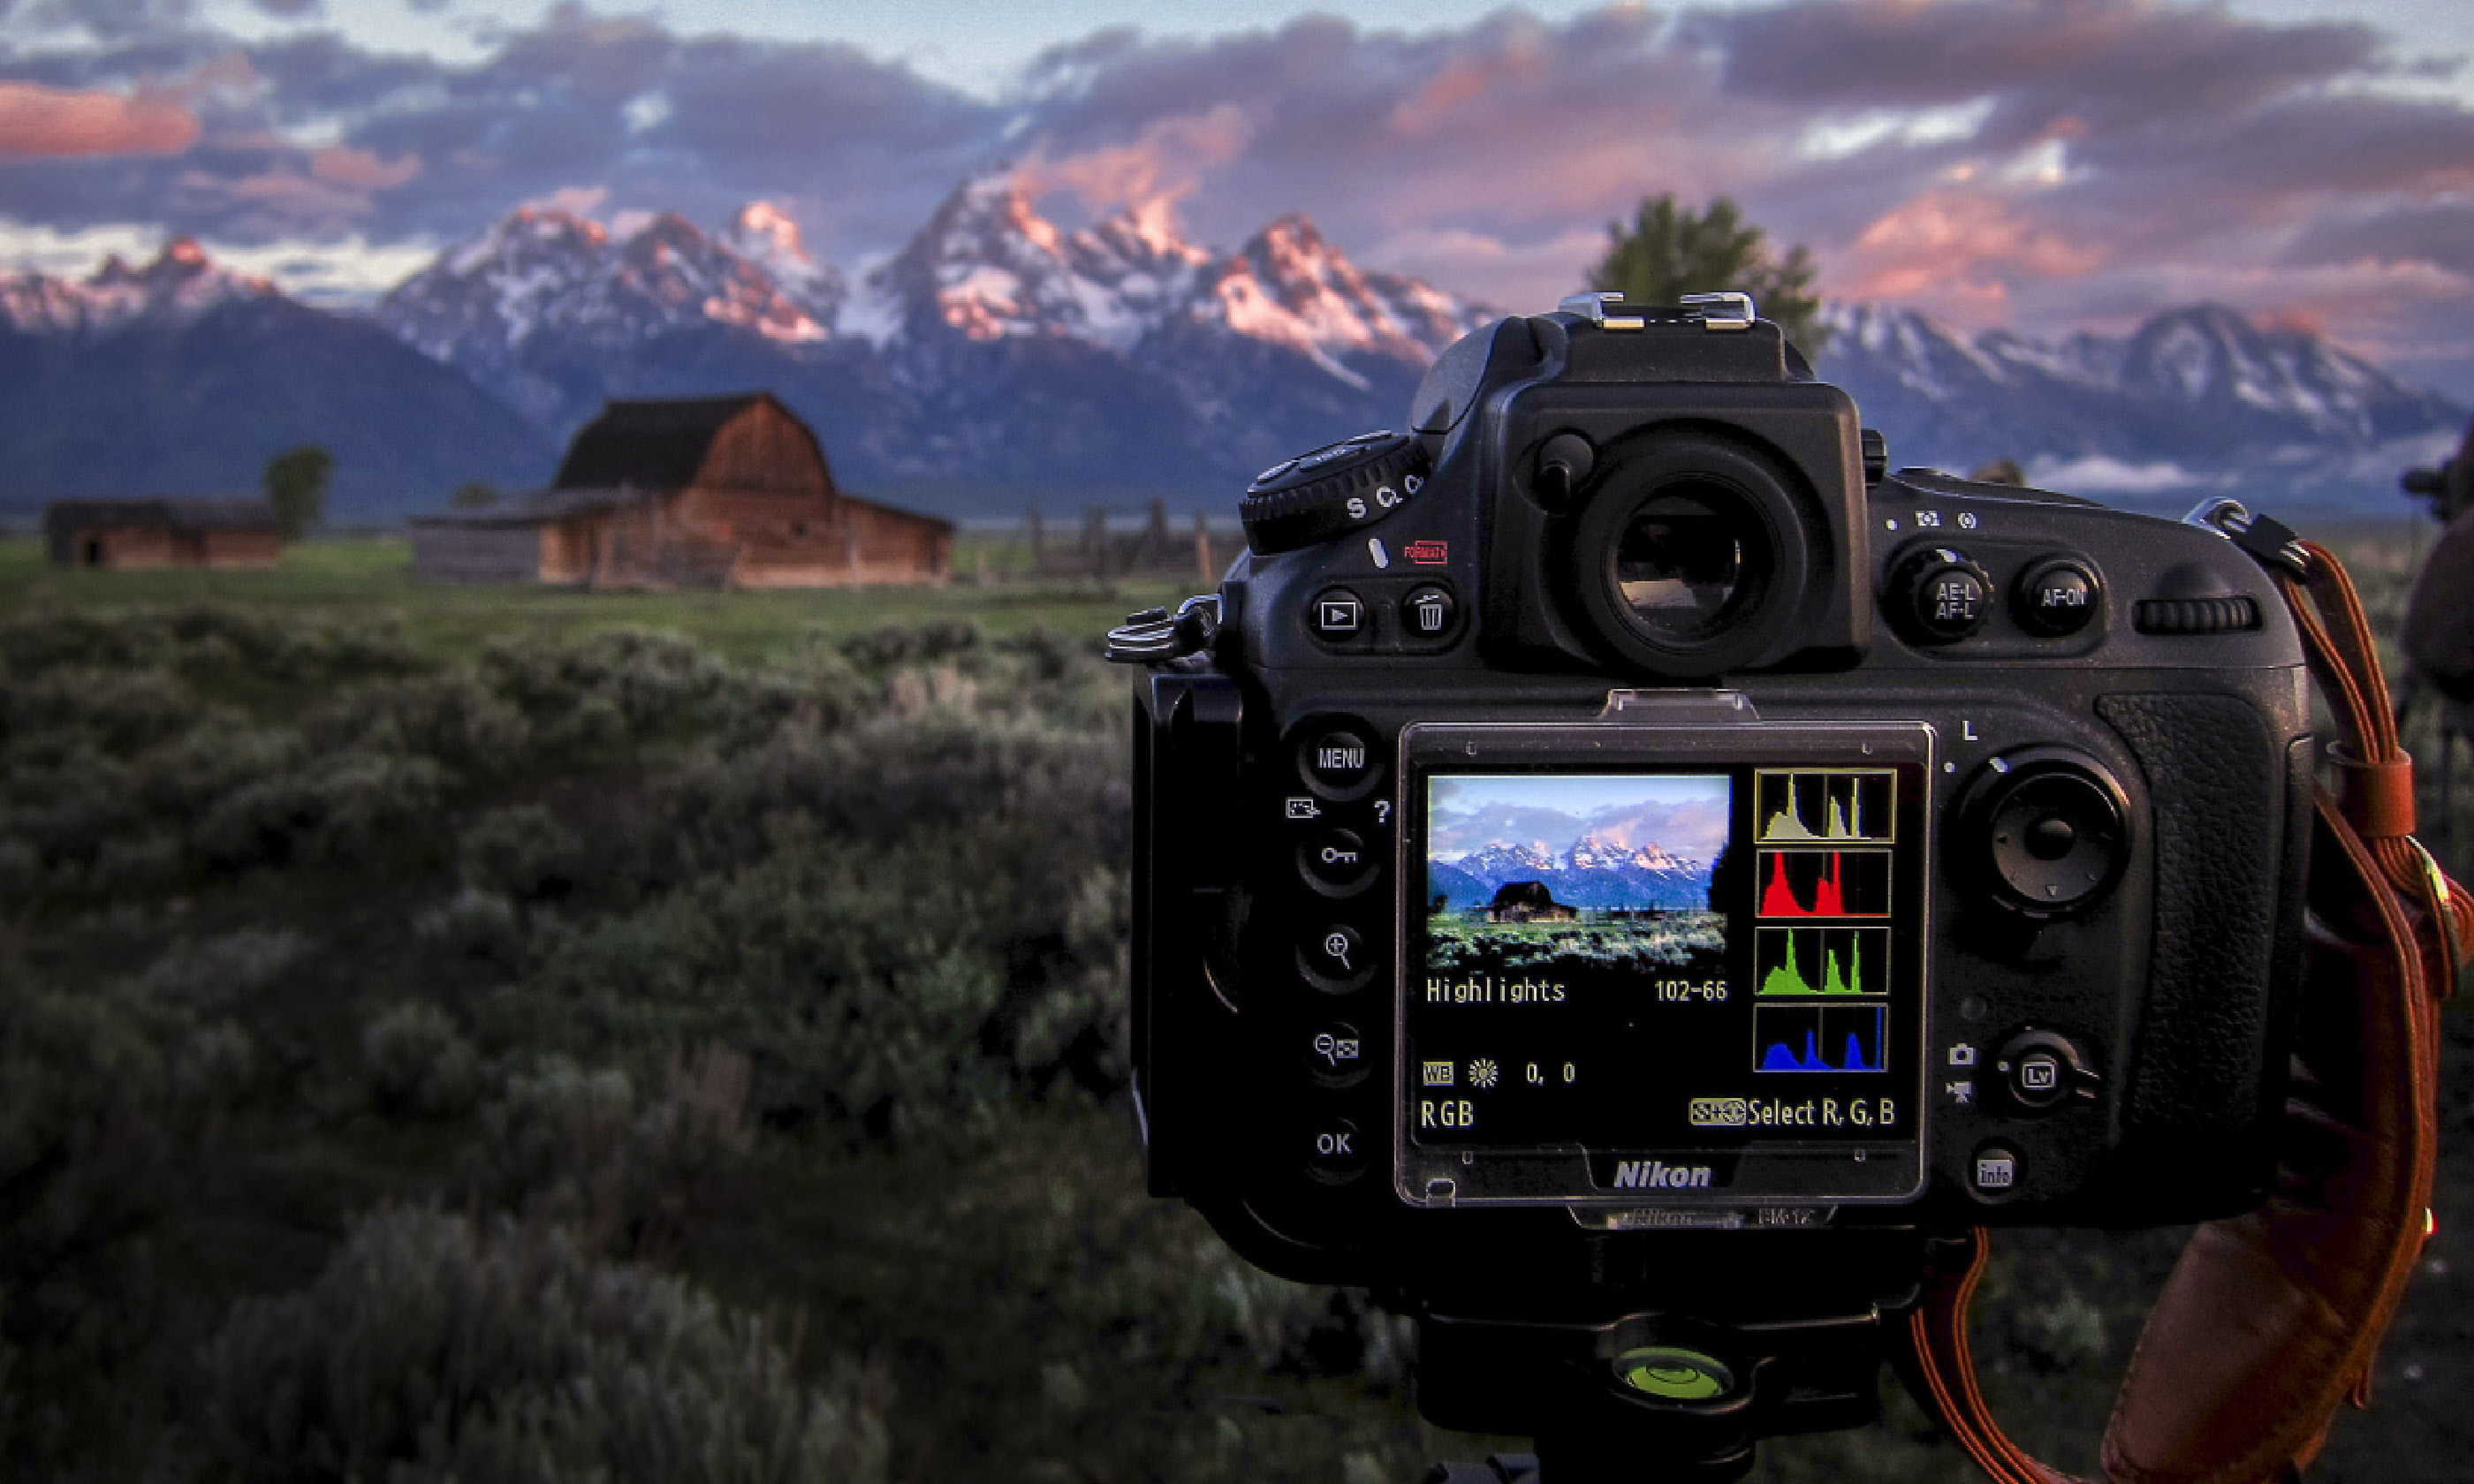
Most digital cameras will have an analysis tool called a histogram – a graph of the tones of the image – on the preview screen. It is much easier to see and assess in strong light than the image itself. Some cameras can also show a separate histogram for each of the red, green and blue channels of your picture, but here you want the single graph that refers to the whole image.
An image is made up of pixels. Each pixel in a jpeg can have one of 256 tonal levels, where 0 is absolute black and 255 is absolute white. The extreme tones will have no detail.
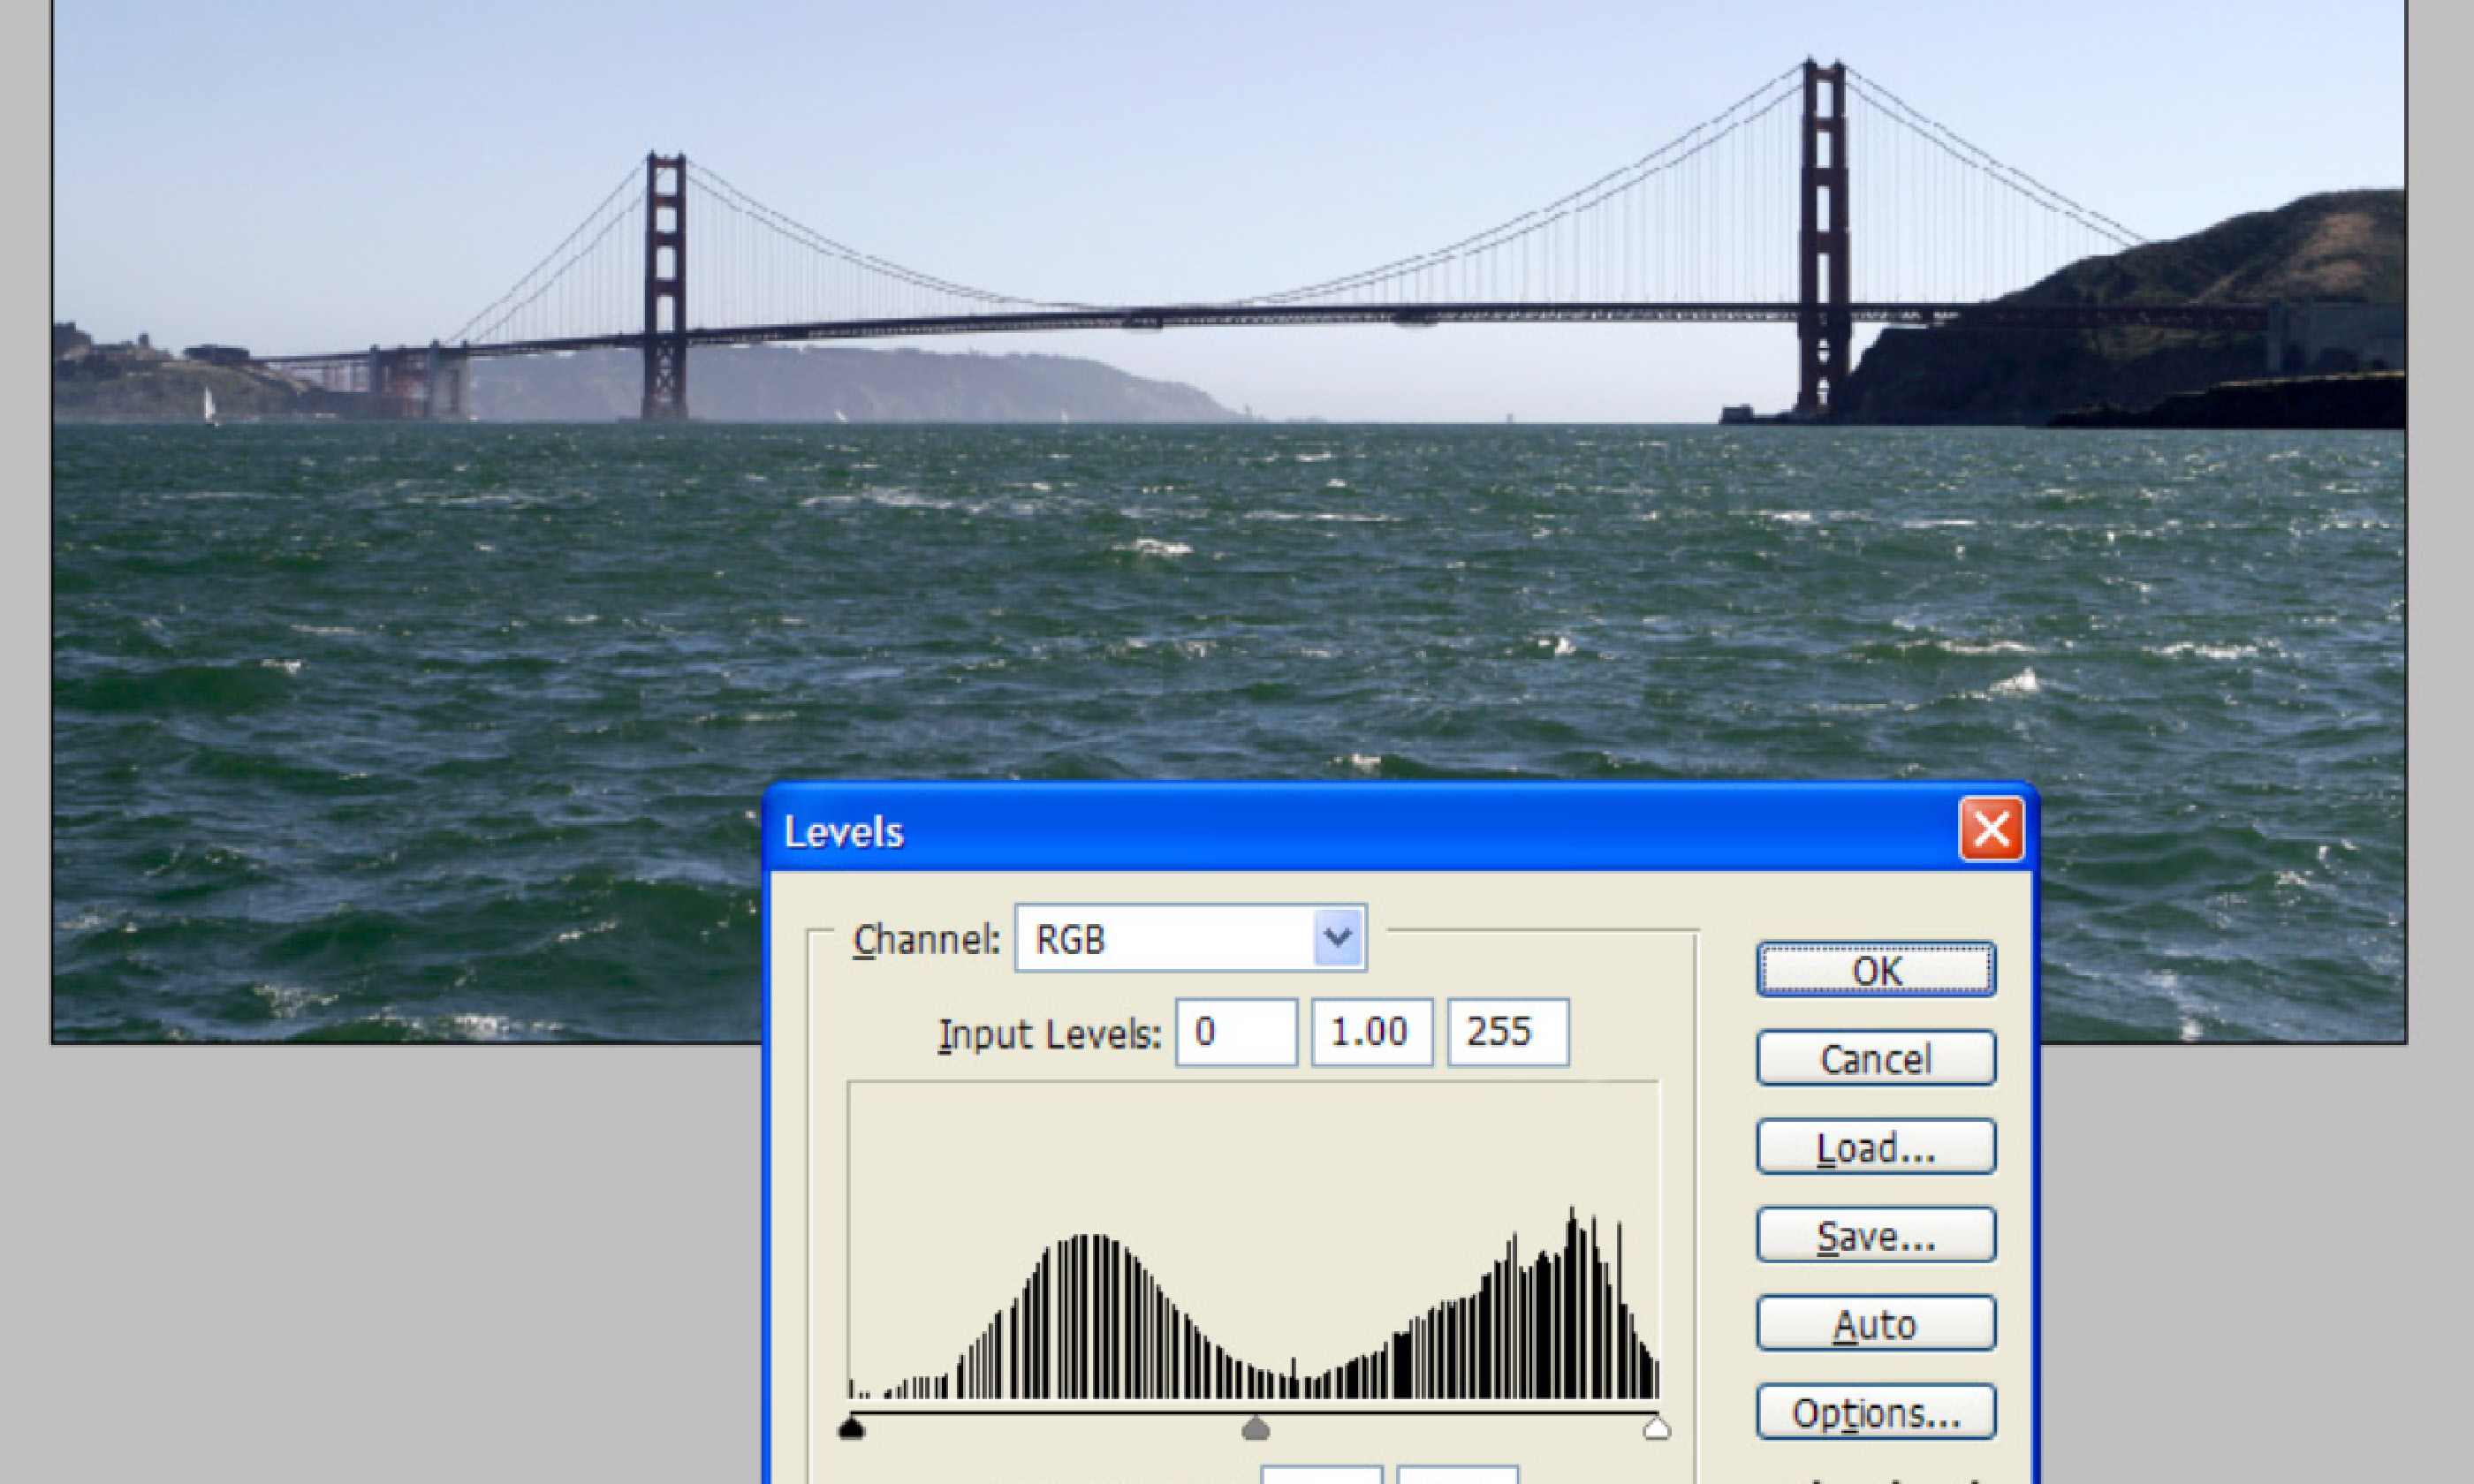
On a histogram, the horizontal axis shows the range of tones, with 0 (black) at the left and 255 (white) at the right. Imagine the horizontal axis broken down into five sections: the zone on the far left represents the shadows, the far right the highlights. The middle three sectors represent dark, mid and light tones.
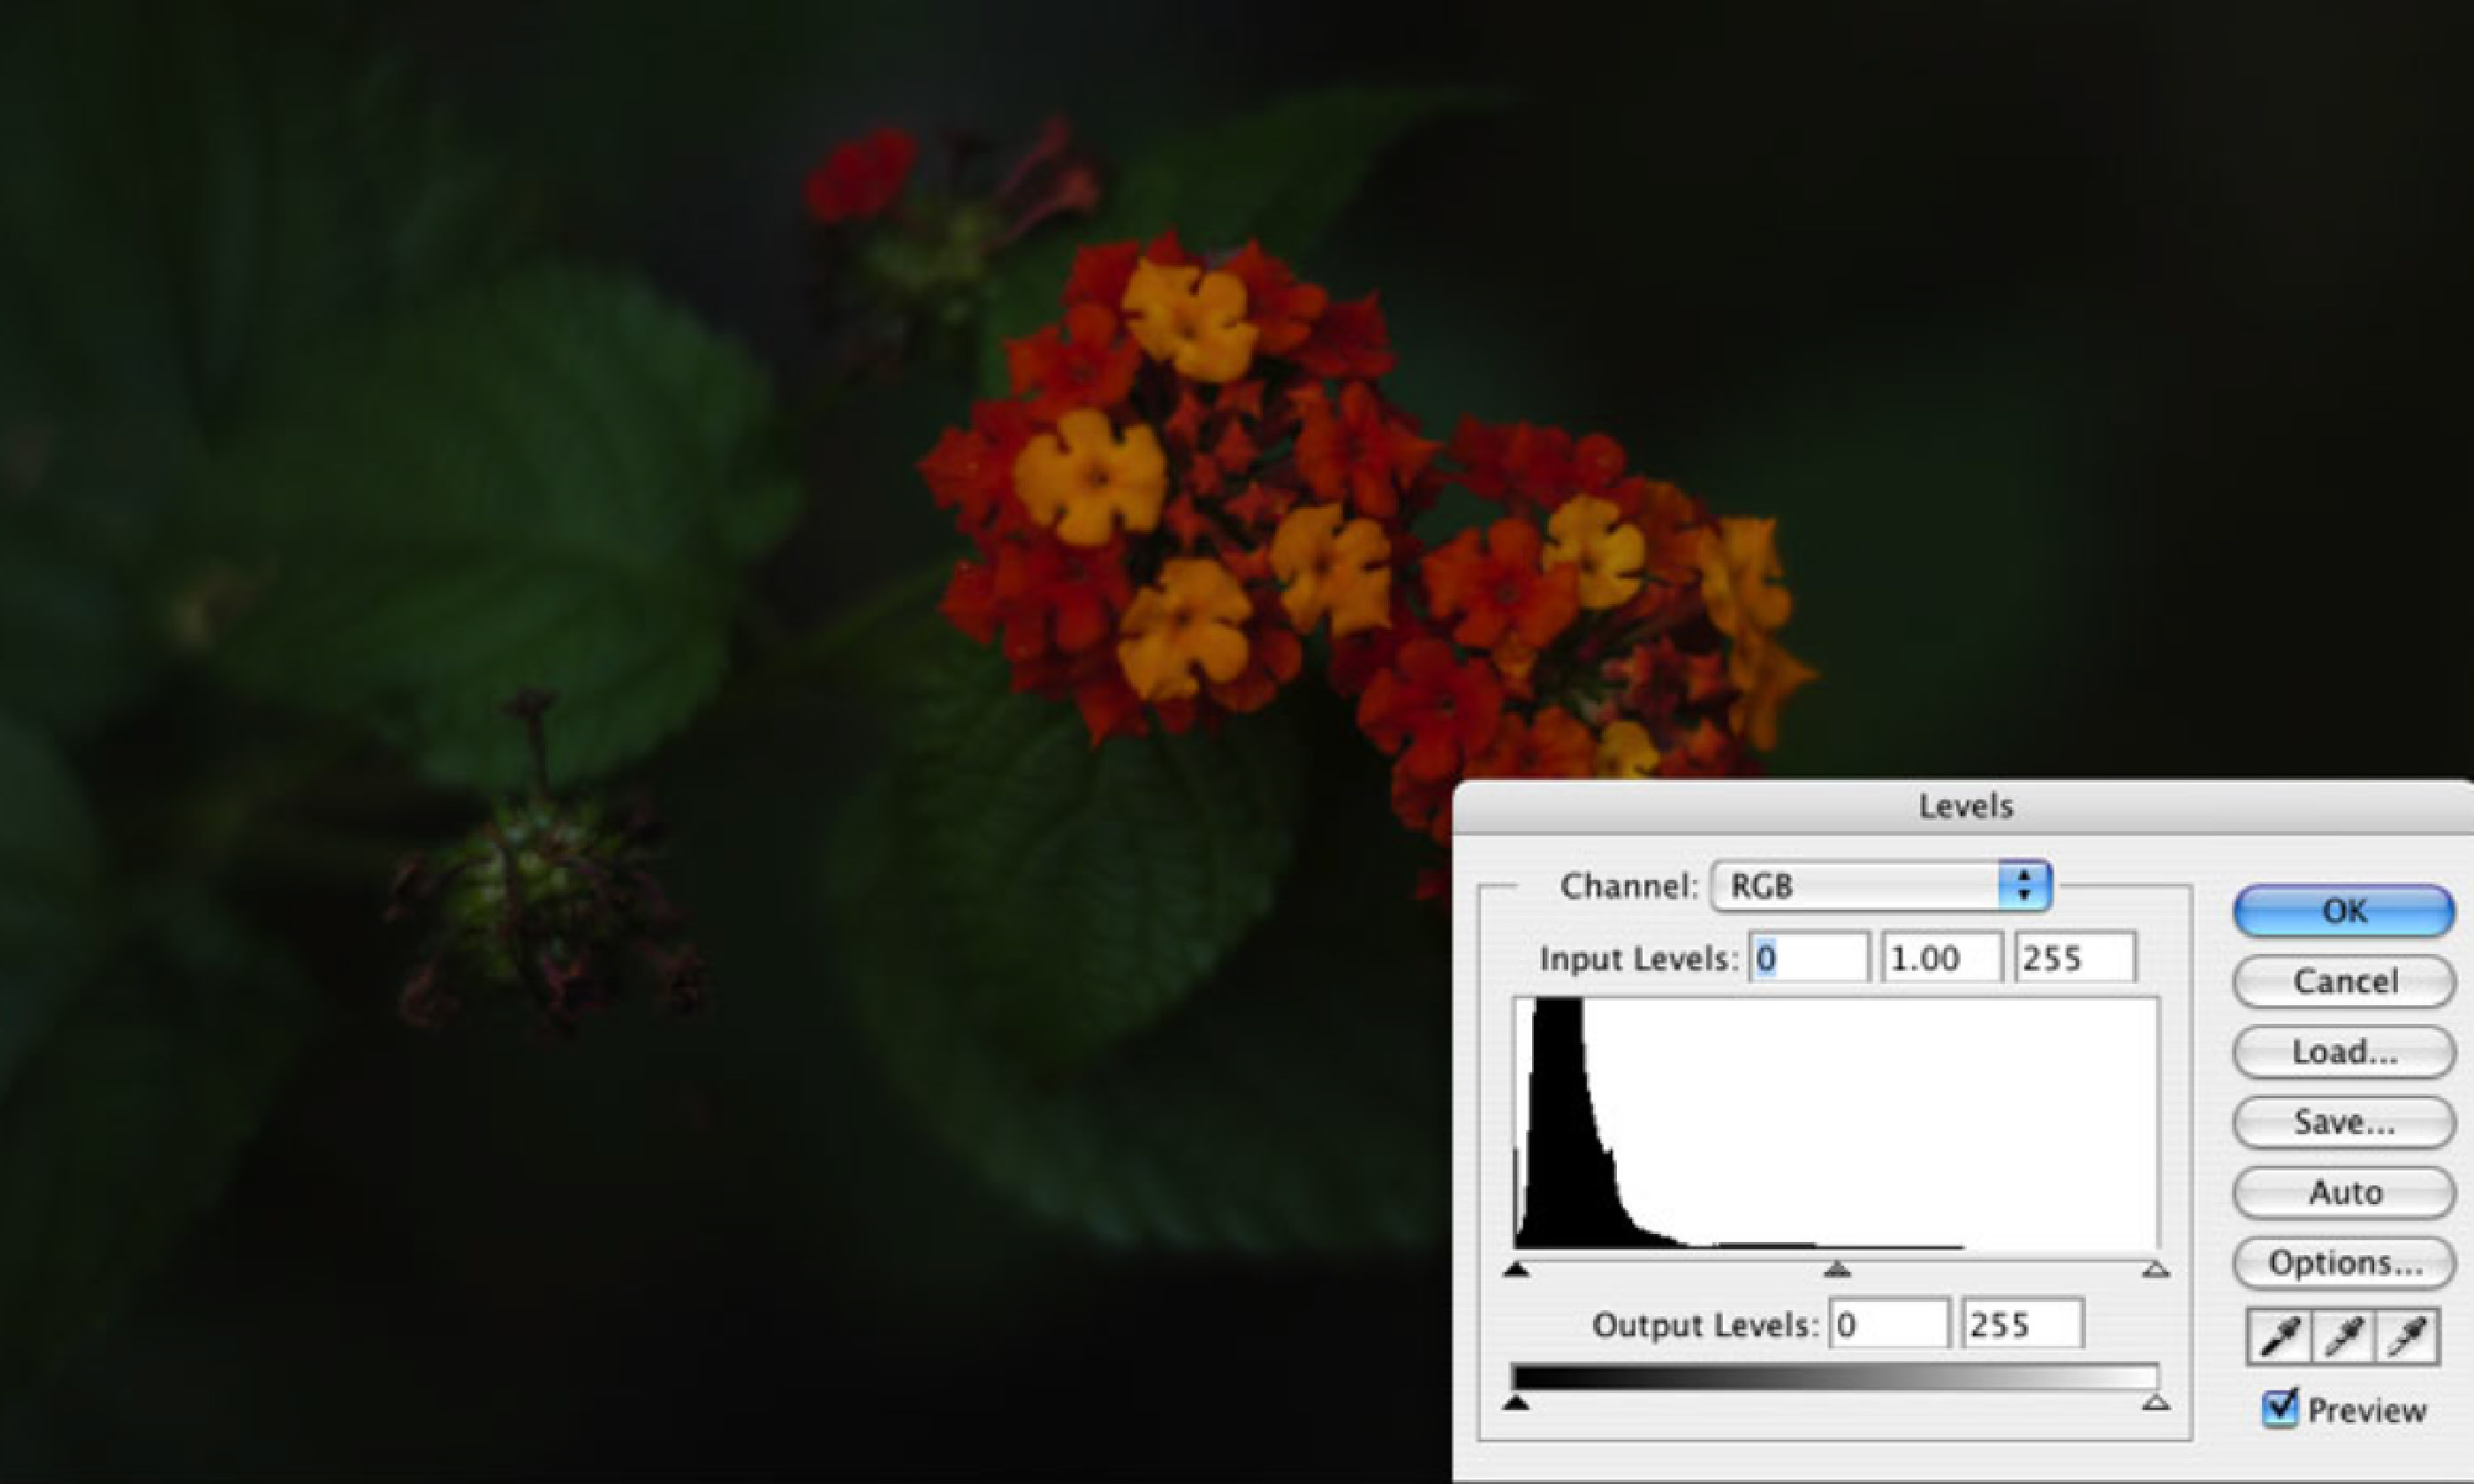
The vertical axis represents the numbers of pixels of each tone. The higher the graph in each section, the higher the number of pixels of that tone. For example, if the graph is higher on the far left, the image will probably be darker – and could be under exposed. If the histogram has peaks in the middle, the mid tones are dominant.

Histogram (Flickr C/C: Jason Parker)
There is no such thing as a 'bad' or 'good' histogram – after all, for some photos you might want dark tones to be dominant (shooting a night scene), or light tones to be dominant (shooting in the snow). Treat histograms as information, and get into the habit of looking at them, and understanding what they're telling you.
Image-editing software such as Adobe Photoshop uses histograms to help amend pictures. Once you are familiar with histograms, you can assess the exposure and contrast of your photo, then make changes to it where needed.
Getting a correct exposure is vital in photography, especially if you are shooting in jpeg format, which has very little exposure latitude.

Histogram (Flickr C/C: Scott Ashkenaz)
If your picture is under- or overexposed you can correct it to some degree in Photoshop. However, you will lose quality and tonal gradation (especially in the shadows); also, if the highlights are overexposed on the original jpeg file, they will be lost – and there’s little you can do to salvage them.
Some cameras also feature an overexposure indicator. This flashes up the parts of your picture registering a tonal level of 255: the blown highlights. If there are just a few obvious bits – eg lightbulbs – then you can ignore them, but if key parts of the picture are flashing, you might want to consider reducing the exposure.
It takes some practice to read a histogram but once you know what you are doing you can use it as the basis for controlling your exposure – and you need never take over- or underexposed pictures.
How to take great photos in the snow | Cold snaps
Snapping the Northern Lights | Turn photons into pixels
Photography tips: shooting sand | How to take great desert shots
Taking photos of local people | A little respect goes a long way