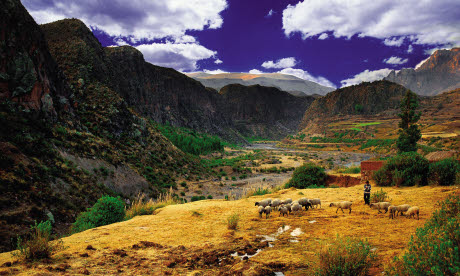
When it comes to taking the perfect picture a bit of cropping and colour converting might just be necessary. But remember, it’s not always cheating says Steve Davey
Right from the earliest days of photography, people have been retouching pictures: airbrushing was the generic term long before ‘Photoshop’ had even been invented, and everyone from the Victorians to the Soviets used to routinely remove unwanted people and things from their pictures with a little bit of re-painting. Yet it is digital photography that has now become synonymous with ‘cheating’ by changing pictures on a computer.
We are all familiar with the so-called digital art, where unfeasibly large full moons are dropped into pictures or countless zebras are cloned to fill the African Plain, but not all cheats are, well, cheating. Sometimes they are simply techniques that the professionals use to make their pictures more, not less, real! Even the best digital camera is hopeless compared to the human eye, and before any film luddites start chest-thumping, film cameras were worse!
The main issue is that our eyes have the biggest retouching software attached to them – the human brain. We can pick out detail, remove a colour cast and manage contrast far better than any camera. To even come close to what the human eye can achieve, you have to step in and help your camera a little bit.
There are many complicated tweaks that can be done using prohibitively expensive professional software like Adobe Photoshop, which costs more than the average camera!
Yet the cheats here can often be done in a few seconds with little or no experience and sometimes with software that is completely free. You don’t have to be a computer genius to improve your pictures and combat the limitations of your camera, but sometimes you do need to cheat just a little bit!
What we perceive as white light is actually a bundle of coloured wavelengths, which gives light a colour cast (a tint that effects the whole image): shadow light is distinctly blue, candle light positively red and fluorescent light a sickly green. The human eye compensates for this, so we seldom are aware of these colour casts. Your camera should also have an Auto White Balance function, which tries to reduce these casts, but if it doesn’t work correctly, or if your white balance is on the wrong setting you can use the Auto Colour function to sort out the colours. You can also use the white balance slider to cool down or warm up your images manually, to reduce casts or enhance them for creative effect.
Many images will bene fit from a little bit of cropping to improve their composition and make them more effective. With some images it is an absolute necessity. It might be that you don’t have a powerful enough lens on the camera, or a group of moving objects have been part cropped out of the frame. It could be that you inadvertently tilted the camera so that the horizon isn’t straight. Luckily you can simply improve the crop and straighten the image, although my recommendation is to always crop to the same ratio as the original frame if you can.
If you photograph people at midday when the sun is directly overhead their faces can be obscured by deep shadow, especially if they are wearing a hat! You can get around this by using f ill f lash, where you force the f lash to f ire, but if you don’t want to do this in someone’s face, you can lighten the shadows on a computer using the shadows slider. On some software this is called fill-light.
I am not often a fan of converting images to black and white: often it’s done to bring supposed gravitas to an otherwise lacklustre image. However, there are times when black and white is perfect. It might be that there is a brightly coloured object in the frame that is distracting, or the colours of the image don’t suit the mood. Most software will allow you to convert an image to black and white, and they will usually do a better job than recording the picture in black and white with the camera.
The point is to enhance your images and not to allow these changes to dominate them. Subtlety will mean that people will appreciate your photography and not your computer skills.
Don’t forget the undo function: if you don’t like the effect of something, you can always undo it and try again. If you want to try a few things, then make sure to work on a copy of your picture.
Not quite the kitbag, but you will need to get some software to work on your images. If you are a Mac user, then Apple iPhoto can make all of these changes, or you can use Google Picasa.