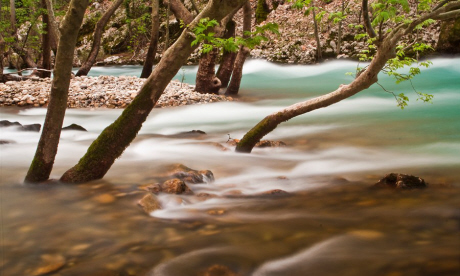
It moves, it reflects, it makes simply keeping your camera steady a bit of a challenge. Steve Davey helps you become captain of your camera with water
Apart from faces, water is the most expressive thing you can photograph. It can show all sorts of emotions and nuances, from dark and brooding through to light and colourful. Yet for most photographers, water is at best incidental, at worst a hazard to be avoided. With a bit of thought, preparation and creativity though, you can take atmospheric pictures of water and avoid getting your feet – and your camera – wet.
Water is a perfect mirror to any colour: at sunset it will glow red, it is inky black in a storm and azure under blue skies. Adjust the white balance of the image (in-camera if shooting JPEG, in post-processing if shooting RAW) to accentuate the colours. A polarising filter will cut down reflections on the surface of the water.
If you’re on a moving vessel, compose quite loosely. The movement of the waves will change the composition, and if there is an object close to the edge of the frame it can easily be cropped off. You might need to allow some extra space around the edges of the frame to later rotate the image to straighten a horizon: it’s almost impossible to get the horizon level in-camera on a moving boat.
Try experimenting with different techniques when photographing water. If it’s moving significantly, choose a fast shutter speed (1/1000 second or higher) to freeze waves and bubbling spray, or a slow speed (1 second or more) to cause the water to blur. The longer the shutter speed, the more ethereal the water will look. You might need a neutral-density filter to cut out enough light to allow you to use a slow speed; you will also need a tripod. The secret is that only the water should be blurred: any rocks, beaches or riverbanks should be completely sharp.
1. Accentuate reflections
Compose the picture so there’s equal space for the subject and the reflection. Water will absorb about two stops of light, so usually appears darker. You could use a graduated neutral-density filter, which is dark on one side to balance the exposures. This can also be done post-processing.
2. Fill the frame
Try filling the frame with water. Take the picture just as the waves start to break. You’ll want to use a fast shutter speed to freeze the crest of the wave into animated shapes.
3. Enhance highlights
When bright sun reflects on water you often get spectacular highlights – super-bright specks of overexposed light. These can be used as graphic elements, and are ideal for creating silhouettes. Bright parts of the image will confuse your camera meter: allow at least +2 stops to avoid underexposure of the rest of the image.
4. GIVE WATER ROOM
When photographing idyllic islands, tilt the camera down to include more sea than sky. This will accentuate the turquoise waters. You could also use a polarising filter to reduce reflections.
1. If you only remember one thing…
Water is a subject in itself – it’s not just a convenient space-filler. Look for its moods, patterns and textures, and then experiment with your photographic skills to record them.
2. Tech tip
To accentuate that amazing tropical turquoise sea, shoot with a polarising filter to reduce reflections coming from the surface of the water and warm up the picture by adjusting the white balance.
3. One for the kitbag
A lens with Vibration Reduction (VR) can negate the shake of a moving camera. Use normal mode if your boat isn’t moving fast, use active mode if it is. Take a couple of shots in quick succession – VR can take an instant to kick in.
For more travel photography articles by professional, Steve Davey see his profile here
Ever wanted to take better travel photos? Find out how you can here
10 tips for better travel photos | Inspire me... More
Photography tips: mastering mountains | Advice... More
Photography tips: shooting sunsets | Advice... More