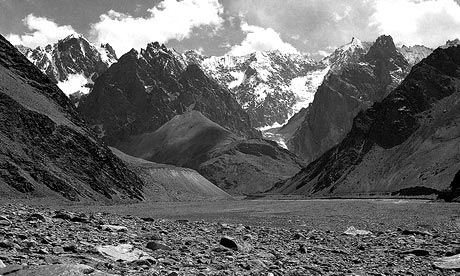
Not every image shot in black and white looks arty – you need a bit of know-how. Change you black and white images from grey to great
Black and white photography used to be a complicated process – more akin to alchemy than photography. To print their monotone pictures photographers had to spend hours in a darkroom, elbow deep in noxious chemicals.
With the advent of digital it’s all become much easier: now you don’t have to master a difficult and time-consuming process just to produce black and white images.
Good black and white photography exploits the unique characteristics of the medium. It should not be used to try to rescue a bad shot that wouldn’t look good in colour. While some people say you can shoot black and white on dull, overcast days, this will generally produce a dull, flat picture.
A lot of the rules for colour photography apply to black and white as well. Early morning and late afternoon light is best – not for the warmth that you get in colour photography, but for its softness and low angle. Overhead midday sun will give either very flat or too harsh lighting, obliterating details of faces and buildings.
Black and white photography thrives on light and contrast. As long as the light isn’t from directly overhead, your monotone pictures can generally endure far deeper shadows than colour ones. These will appear on your picture as rich and atmospheric blacks. Look out for directional light and the subtle interplay of highlights and shadow.
You need to think differently when composing a black and white picture. Bright colours that can be used as compositional elements in a colour photograph will blend into the background. Greens and reds will render pretty much the same tone, so you should look for contrast of light instead.
Other things to avoid are large areas of relatively featureless colour. Sweeping blue skies, which can look so good in colour, will be reduced to a bland grey. Try instead to photograph active skies, peppered with white clouds or dramatically overcast.
Textures work particularly well, whether emphasised by light and shadow or just by a combination of light and dark tones. Portraits work well in black and white too, especially if they have been shot in directional lighting. This can show up all the textures in the skin and hair, especially in older, weatherworn faces.
To see if a picture is likely to work in black and white, squint at your subject. This reduces the effect of the colours and gives an approximation of how the tones will appear.
Many digital cameras have an option to shoot in black and white, but generally this alone doesn’t give good results – the pictures often look flat and lack drama. You can also convert to greyscale in a manipulation programme, such as Adobe Photoshop or Photoshop Elements. Again, this tends to give quite flat results, as most of the picture will be converted to grey without the rich blacks that often characterise a good black and white image.
The best way to achieve a good image is to shoot in RAW and then convert to black and white at the processing stage. If you don’t have a camera that shoots in RAW, all is not lost. You can use the black and white setting on any digital camera and edit the image on a computer to give it more punch.
Processing a RAW image to black and white is simple: all you need to do is exploit a few simple controls which are present in even the simplest RAW converters that come with your digital SLR.
First, take the saturation right down to give you a simple black and white image. Then make it more atmospheric by using the shadows, highlights, contrast and brightness sliders. Increasing the highlights will give your picture a brighter feel; darkening the shadows will give you richer blacks in the shadow areas. Adjusting the contrast slider can make your image more contrasty, with fewer mid-tones, or less contrasty, with a more subtle range of tones.
Photographers using black and white film use filters to change the relative tones within a picture. Putting a yellow, orange or red filter over the lens progressively darkens blue skies in a black and white picture, and also lightens skin tones. A green filter lightens foliage, preventing it from rendering too grey. A blue filter lightens blue skies and water.
You can achieve these effects digitally by using the colour-temperature and tint sliders used to correct white balance in a colour shot when processing a RAW file. As a rule of thumb, moving the colour-temperature slider to the bluer end of the scale will progressively darken the skies relative to the rest of the picture, and moving it the other way, to the warmer end of the scale, will progressively lighten skin tones relative to the rest of the picture.
A combination of these simple RAW conversion techniques can give you a markedly different image and allow you to experiment with creative black and white photography, without having to spend hours in a darkroom. And you always have the full colour image too!