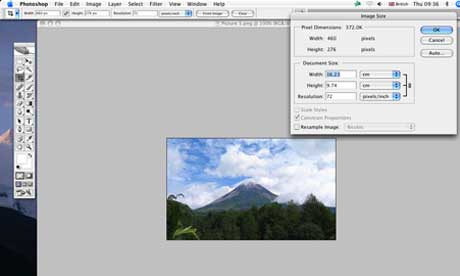
Taking a top shot is all about natural creativity, but a few digital tweaks can be vital in turning an average image into a breathtaking one
The Wanderlust Travel Photograph of the Year competition is for photographers, not for digital artists, and we have deliberately arranged the rules to reflect this.
We want to see great pictures that are the result of your creativity, not from hours spent hunched over a computer. Nevertheless there are a number of improvements you can still make to your digital images; in fact many of them are essential to achieving a good result.
One of the best ways to enhance images is to shoot in ‘RAW’ format – an option on most Digital SLRs (DSLRs). DSLRs have very complex sensors that can record a great deal of information. However, a lot of the information is lost before it’s copied onto a memory card. The information is ‘processed’ by the camera, which makes a series of fairly random estimations about contrast, brightness, colour balance, sharpening and saturation, condenses the data and then saves the image as a lossy-compressed jpeg (a compacted file with information missing).
Many cameras are set to deliberately boost the image, and make it appear vivid and brighter. This looks good when viewed on screen, but often results in lack of shadow detail and burnt-out highlights. Jpeg images can be adjusted on a computer, but as all of the extra information has been discarded during the compression any adjustments can degrade the image quality.
RAW will save the ‘raw’ data; it is recorded by the sensor in the camera and then you can process the information on a computer later. RAW files also hold more information, allowing the individual attributes – contrast, brightness, colour balance, sharpening and saturation – to be manipulated, and you can decide what information is used, resulting in a better-quality image. The downsides to shooting RAW are: larger file sizes, the need for extra software and the time spent adjusting each image.
The adjustments allowed in our Photo of the Year competition are limited to these – a range of controls to manipulate an image’s tonality. Many have an overlapping effect, and you are unlikely to need all of them on a single image.
Levels The ‘levels’ tool is represented as a graph of your image (top right on screen above). It allows you to lighten the highlights, darken the shadows and set where the mid tones go. This gives an image a much better tonal range. Some software has separate slider controls for shadows, highlights and mid tones. In most cases, highlights and shadows should be moved to almost clip the ends of the graph. This will stretch the tones so all possible tones in the digital image are used.
Exposure This tool is similar to giving more or less exposure with the camera. However, avoid relying on it to fix the exposure, as it is never as good as getting it right in the first place. When rescuing highlights some information is always lost and lightening shadows will magnify the random noise (graininess) present in any image file.
Brightness The brightness command is similar to the ‘exposure’ tool, but has a greater effect on mid tones, making the image appear brighter overall.
Shadow/highlight recovery This targets the shadows or highlights of your image, bringing back lost details – especially if applied to a RAW file.
Curves The ‘curve’ tool is another graph of the image – this time a line graph. It allows you far more control over individual tonal areas of the image, changes the relationships of the tones and boosts or reduces certain areas. It takes a lot of practice to manipulate, and some software will give you individual sliders to adjust each part of the graph.
Contrast Often there is too much contrast between shadows and highlights, leading to one or both of them holding no detail. At other times the image will look flat and lifeless. Adjusting the contrast can either flatten out a too-contrasty image, or give life to a dull picture.
Colour/white balance You can adjust the image’s colour balance, which is used to correct or enhance colour casts caused by the different colour temperatures of light (see Phototips, Wanderlust Dec 2006/Jan 2007). A ‘white balance’ tool, will mimic the ‘white balance’ facility of a digital camera, whereas the more complex ‘colour balance’ tool will allow you to make different and subtle changes to the highlights, shadows or mid tones of an image.
Saturation/vibrance Colour intensity is controlled by the ‘saturation’ command. If any colour looks too intense – such as the effect given by red flowers in sunshine – dial down saturation to stop colour blocking out and reintroduce detail. If the image looks dull, increasing saturation can give colours a boost. Some software will have a ‘vibrance’ command that works like the ‘saturation’ tool but is subtler.
Noise control Digital cameras have some degree of random noise, especially in lightened shadow areas and at high ISOs (the measure of the camera’s sensitivity to light exposure). Noise reduction masks this, giving a smoother, less grainy effect.
Sharpening All digital images will require a degree of sharpening to show all of the detail that is in the image. Avoid over-sharpening though, especially in areas of fine detail such as grass or foliage, or the result will look almost etched.